Spicy Thai Mussels, aka Thai them on!

Standard
I am a little ashamed to admit that I’ve turned into Martha Stewart–Manang Stewart to be more exact–in that I love planning theme parties.  Actually, I only really like planning one type of theme party and that is the luau.  Because of my love for everything Hawaiian– from the food to the aloha spirit and the beauty of the islands–the luau evokes all these things for me and my guests.  We go all out with lighted tiki torches and a menu of lomi lomi salmon and kalua pork, huli huli chicken and passion fruit mochi and POG juice to wash it down.  Once, I even made my own poke with fresh ahi tuna, limu and kukui nut procured from one of my all-time favorite markets Takahashi in San Mateo.

IMG_3261

If I could dig up an imu in which to bury a whole pig wrapped in ti leaves the way kalua pork is traditionally made, I would.  Except Pru would have a problem with my doing that in our cemented backyard.

I’m planning to serve my spicy Thai mussels for a luau we’re having in August.  Yeah, yeah they’re not Hawaiian but they seafood braised in coconut milk so close enough.  This dish is so easy to make and will wow your guests with bold, spicy flavors from the Thai chiles and ginger.  They’ll also love sopping up the savory broth with a crusty baguette or over rice.  I tried using low fat coconut milk in this recipe but it didn’t come out as rich nor as flavorful as when I used the full fat variety.  So splurge on the extra calories, it will be worth it!

Recipe adapted from Tyler Florence’s Steamed Mussels with Coconut Milk and Thai Chiles


4 garlic cloves, coarsely chopped2 Thai chiles, thickly sliced

One 1 1/2-inch piece of fresh ginger, peeled and coarsely chopped

1 cup cilantro leaves

Finely grated zest of 1 lime

1/4 cup extra-virgin olive oil

Two 13 1/2-ounce cans unsweetened coconut milk

Juice of 2 limes

Salt

One 11- to 12-ounce bottle lager

5 pounds mussels, scrubbed

  1. In a food processor, combine the garlic, chiles, ginger, cilantro, lime zest and olive oil and process to a paste; transfer to a large bowl. Whisk in the coconut milk and lime juice and season with salt.
  2. In a large soup pot, bring the lager to a boil over high heat. Boil until reduced to 1/2 cup, about 7 minutes. Add the mussels, cover and cook, shaking the pot a few times, until the mussels just begin to open, about 4 minutes.
  3. Uncover the mussels and stir in the coconut milk mixture. Cover and cook, shaking the pot a few times, until all of the mussels open, about 8 minutes. Spoon the mussels and broth into bowls and serve.
 

The recipe can be prepared through Step 1 and refrigerated overnight.

cropped-img_1397.jpg

BAEbingka: Bibingka in Muffin Tins

Standard

Celebrating Christmas as a kid in the Philippines was very different than it is here.  My earliest memory was of my grandmother standing over baked hams and chickens hours before our midnight feast or ‘media noche’ as celebrated by many Filipinos, tending to them with love and careful attention.  My family didn’t have much, so it was not about counting the number of shopping days left, tons of presents under the tree, scanning the Black Friday ads. In short, it wasn’t about stuff.

What it was about was family, food and the ‘exchange gift’ or White Elephant but much kinder because there was no stealing involved. What I remember most about Christmas though is the bibingka, a Filipino rice cake baked in banana leaves and topped with cheese and salted egg. I believe Filipinos started combining the salt/savory thing before it even became en vogue and this is evidenced by our love for the bibingka.

My grandmothers made their own versions of bibingka and I no longer remember which was better but it was always this great combination of salty bites of duck egg and the sweet softness of the rice cake. It was the crowning glory of our media noche, which began with pork barbecue sticks, longanisa and lechon and ended with the bibingka.  Lechon by the way is roasted suckling pig and proclaimed by Anthony Bourdain as the best pork product ever. The Filipinos, we love our pork.

But I digress.

For portion control purposes, I decided I would make my bibingka in muffin tins.

Recipe adapted from Panlasang Pinoy

Ingredients

1 cup rice flour
1/8 teaspoon salt
2 1/2 teaspoon baking powder
3 tablespoons butter
1 cup granulated sugar
1 cup coconut milk
1/4 cup fresh milk
1 piece salted duck egg, sliced
1/2 cup grated cheese
3 pieces raw eggs
Pre-cut banana leaf

Procedure

  1. Preheat oven to 375 degrees.
  2. Combine rice flour, baking powder, and salt then mix well. Set aside.
  3. Cream butter then gradually put-in sugar while whisking.
  4. Add the eggs then whisk until every ingredient is well incorporated.
  5. Gradually add the rice flour, salt, and baking powder mixture then continue mixing.
  6. Pour-in coconut milk and fresh milk then whisk some more for 1 to 2 minutes.
  7. Use the bottom of a glass as a template to cut banana leaves in circles slightly larger than the  size of your muffin tin openings.  This allows for a nice overhang and ample size to hold the bibingka batter.
  8. Line muffin tins with your pre-cut banana leaves.
  9. Pour batter into lined muffin tins.
  10. Bake for 15 minutes.
  11. Remove from the oven then top with sliced salted egg and grated cheese (do not turn the oven off).
  12. Put back in the oven and bake for 10 to 15 minutes or until the top turns a medium brown.
  13. Remove from the oven and let cool.
  14. Brush with butter and sprinkle some sugar on top. You can also top this with grated coconut.

Notes:

If you’re thinking about omitting the banana leaf liner, don’t.  The banana leaves give your bibingka a fragrant and authentic look and smell.

If you’re thinking about omitting the salted egg, by all means do.  It’s an acquired taste and also hard to find outside Filipino groceries.  I would, however, include the grated cheese to balance out the sweet and savory.

image

Sriracha and Wasabi Aioli

Standard

I don’t care for Guy Fieri.  There’s this lounge lizard quality about him that no matter how legit he tries to be (game show host?  Really?) he’ll always be this lecherous character to me. But the one thing I learned from Guy is how useful and handy squeeze bottles are. You can control amounts of sauce, you can see what you’re using and they’re super cheap at about $1 a pop and found everywhere.

My favorite condiment right now is my own homemade sriracha and wasabi aoli and they are stored in my Guy Fieri-inspired squeeze bottles (I cringe at the thought of admitting that). I first saw them served at food trucks, usually found on side tables right next to napkins and the like. They were a great flavor boost to Korean tacos and burritos, waffle fries and anything else you care to jazz up. You can use regular mayonnaise but I prefer the Japanese Kewpie Mayo, as I find this to be sweeter and not as gloppy than its American cousin. You can find Kewpie at any Asian grocery.

Sriracha Aioli

1 cup Japanese Kewpie or Best Foods Mayonnaise
3 tablespoons Sriracha
1 teaspoon rice vinegar
1/2 teaspoon sugar

Whisk together the mayonnaise, Sriracha and sugar. Use more or less of the Sriracha to adjust the heat.

Wasabi Aioli

1 cup Japanese Kewpie or Best Foods Mayonnaise
3 teaspoons wasabi paste
1 teaspoon rice vinegar

Whisk together the mayonnaise, wasabi paste and rice vinegar. Use more or less of the wasabi paste to adjust the heat.

20140703-120923-43763176.jpg

These sauces have been wonderful additions to some of my creations:

20140703-123122-45082702.jpg

20140703-123122-45082224.jpg

20140703-123121-45081996.jpg

Loco Moco

Image

Vacations to Hawaii are my favorite.  About two weeks or so before leaving for any one of the islands–you can’t go wrong with any of them–I take out my suitcase from the closet, open it flat and lay it out.  I don’t pack–that would be crazy–instead, every time I come home from a really bad day at work, I go to my closet and toss in an article of clothing into the suitcase to remind me that I am mere weeks away from paradise and more importantly, away from the purgatory penance that work sometimes feels like.

There have been times when I am fully packed for vacation with the suitcase piled high with clothes, it’s that therapeutic.

This year, I got outvoted and we are going instead to Disney World.  I voted Oahu.  So because I lost, I requested that Pru make my favorite island lunch, the loco moco–a crazy unhealthy concoction of burger patty topped with an over easy egg and brown gravy, all over rice.

Shortcut pro tip: use Campbell’s Golden Mushroom canned soup for your gravy and thin it with water to your desired consistency.


  1. Fry a sunny side up egg.
  2. Lay fried egg atop a bowl of steamed rice.
  3. For burger patty: season with Lipton Onion Soup Mix and pan fry.  We used pre-formed patties.  Don’t judge.  Sometimes, short cuts are the only way to go.
  4. Place fried burger patty on top of egg and steamed rice.
  5. Enjoy your food coma and thank me for the shortcuts.
  6. Shut your eyes tight and dream of your island vacation and eating that loco moco while watching the gorgeous sunset  along the Waikiki beach coastline.

Loco Moco

Poke! From Costco. Oh.

Standard

Actually it’s not that bad. It’s no Foodland and not even in the same universe that is Da Poke Shack but if you can’t afford an island vacation or like me, made the unwise and ill-informed decision of Disneyworld in June (Really? It’s 90 degrees in Orlando now? Oh good…) then make a stop at your nearby Costco. And get your fill of ahi poke, wasabi poke, shoyu poke, etc. Prices are pretty modest at $16.99/lb.

We added some sriracha aoli to this one and made it a spicy ahi poke. If you shut your eyes real tight and play some Iz, you’ll be transported to Kona. Or Maui. Or just lunch with the peeps who talked you into Disneyworld. In June. In 90 degree heat.

20140621-143610-52570248.jpg

if Tamale never comes…

Standard

There was a time when food trucks were called Roach Coaches, regarded as a step below fast food and just above Applebee’s but a lot has changed in the last few years.  Street food has become en vogue, Off the Grid has a following and entire festivals are devoted to reinventing your grandma’s old recipes.

Enter: the humble tamale

Lard and masa or cornmeal are the magical base of your tamale.  I got my lard at a local Mexican grocery store, the thankfully saved from bankruptcy chain, Mi Pueblo.

For the masa harina, I just used Maseca, available in most grocery stores.

IMG_1833

I made two kinds of tamales: one with salsa verde and the other with pasilla chilis, the red variety.

IMG_1829

Soak pasilla peppers in hot water to soften and make more pliable

     IMG_1832

I used the Costco rotisserie chicken, shredded it and combined with the soaked pasilla peppers along with 1 cup of the water the peppers soaked in.

    IMG_1830

You also need to soften the tamale wraps by soaking them for an hour or so in hot water

IMG_1837

Wrap and steam as much as a bamboo steamer can hold.  For a tutorial on how to wrap, click here.

IMG_0087Source: Epicurious

Ingredients

20 or so corn husks

Chicken

Shortcut: shred one whole Costco rotisserie chicken

Tomatillo Sauce

Shortcut: 1 jar of your favorite tomatillo sauce, mine happens to be the Trader Joe’s variety

Tamal dough

  • 2 1/2 cups masa harina (cornmeal for tamales; Maseca brand is recommended)
  • 1 to 1 1/2 cups of canned chicken broth (reserved from poaching chicken)
  • 3/4 cup fresh lard or solid vegetable shortening
  • 1 teaspoon baking powder
  • 2 teaspoons salt

Prepare the Corn Husks
Bring a large pot of water to a boil then remove from heat. Add the corn husks, making sure to submerge them under water, and cover the pot. Soak the corn husks in the pot for 20 minutes. They should be soft and flexible, and take on a deep beige color. Remove the corn husks from the water and wrap them in a damp paper towel until you are ready to use them.

Prepare the Tamal Dough
To make the masa, combine the masa harina with 2 cups of the reserved chicken broth and mix well. The masa should have the consistency of a stiff dough. Set aside.

Put the lard in a mixing bowl. Beat the lard with an electric mixer until light and fluffy, about 1 minute. Add half of the masa and beat until well blended. Add the 3 tablespoons of the reserved chicken broth and the remaining masa and continue beating until a teaspoon of the dough dropped into a cup of cold water floats, about 10 minutes. If after 15 minutes of constant beating your dough does not float, move on (despite it not floating, the dough will be fine).

Sprinkle the baking powder and the salt over the dough and mix in well.

Assemble the Tamales
Place a corn husk lengthwise in front of you with the wide side closest to you. Spread 2 tablespoons of the dough all over the bottom half (wide side) of the corn husk, leaving about a 1-inch-wide border on the left and right sides.

Place 2 heaping tablespoons of the filling lengthwise down the center of the dough. Pick up the two long sides of the cornhusk and unite them. Allow the dough to surround the filling by pinching together the corn husk where the dough comes together. Roll both sides of the corn husks in the same direction over the tamal. Fold down the empty top section of the cornhusk and secure it by tying a thin strip of corn husk around the tamal (the top will be open).

Repeat this process until all the corn husks or tamal dough are used up.

Steam the Tamales
Arrange the tameles in a bamboo steamer over gently simmering water.   Cover tightly with a lid and simmer for 40 minutes.

Serve with salsa or Mexican crema

Mommy! There’s no wi-five here!

Standard

I am not a camper.  Never have been.  I did spend the early part of my childhood in a third world country so one would think that I am equipped to handle the rugged outdoors.  I am not.  This past week-end was spent enjoying/tolerating/respecting the awesome that is Yosemite.  We camped for 3 days and 2 nights with limited access to a shower–and by limited I mean–we snuck into the public restroom/semi-private showers in the Wawona Hotel.  And so while you feast your eyes on this incredible sight

Image

woke up to this view every morning

this magnificent find amidst funk, bug bites, sweat and dust was my saving grace.

10419412_10152095905051401_5734191036470858834_n

All told I counted 22 mosquito bites, most of which ballooned to gargantuan hives; no pictures needed to convey the grotesque.

I walked so much that this happened

IMG_6760

…ok so they were 18 years old but still…

Despite having been a buffet for the bugs, the trip was well worth it

IMG_6723IMG_6734IMG_6716

Pro Yosemite tips:

  • Most reserved campsites are booked 6 months in advance.  Plan ahead.
  • The Wawona Village campsite is pretty awesome.  Bathrooms were pristine and smelled pine fresh.
  • We stayed at spots 90 and 91–steps away from the bathroom, plenty of shade.
  • Park rangers are extremely friendly and accommodating so don’t piss them off by not heeding the bear box laws.
  • Early summer temps: 80s-90s during the day, mid 40s at night.  You’re at 4,000 feet–do the math
  • Don’t miss the Mariposa Grove: tour by tram or do the 4 or 6-mile hike.  We opted for audio guided tram.
  • Have music playing as you drive into the valley.  That majestic view of Bridal Veil and Half Dome deserves a soundtrack.  We chose John Williams and the Boston Pops.  Some choose Enya.  Be creative.
  • Lunch at Wawona Hotel will run you about $25-$30.  For more budgetary options, try the Golf Club with hot dogs, nachos or hamburgers at less than $10

Behold…the Sushirrito

Standard

I had my first sushirrito last summer while shopping with my Mom.  We were looking at Louis Vuitton bags that I had no intention of buying, but I am a mom pleaser and so I tolerated hours of watching her pose with various LV purses with price tags that rivaled the GNP of some small African countries.         

IMG_3400

To compensate for this painful experience, we decided to eat at my favorite lunch spot in San Francisco, Sushirrito.  A sushirrito you ask?  It’s a marriage between my two favorite foods on earth: sushi and burritos.  It’s like Ken Watanabe hooking up with Salma Hayek, or dipping into a sauce made of  wasabi and Cholula or dropping a sake bomb into a frosty mug of Corona.  It’s fresh ahi tuna, tempura shrimp and thinly sliced cucumbers on a thin bed of rice and wrapped inside nori and shaped like a medium sized burrito but a giant sushi roll. Sushirritos’ prices range from $8-10 and worth it as they are jam packed with fillings such as the aforementioned tempura shrimp and ahi tuna along with microgreens, vegetables and my personal favorite, pork belly.  Inspired, I decided to try my hand at making this at home. sushirrito I don’t have enough Korean food expertise to make kim chee, much less kim chee fried rice so I found TJ’s version and used that instead–good choice as it was cheap and tasty.  I also opted for soy paper as opposed to nori which the sushirrito is traditionally wrapped in, as it is less chewy and has more give when you bite into it. 20140614-084835-31715101.jpg I loaded my sushirrito with thinly sliced cucumber, TJ’s kim chee fried rice, micro greens also procured from TJ, spicy Korean chicken and drizzled the whole concoction with sriracha aioli. 20140614-084835-31715677.jpg Keep the filling on the lower 3rd of your soy paper wrap and roll tightly away from you, using a sushi bamboo mat.  I found this part a little tricky, mostly because I tried to stuff my burrito like you would a duffle bag with found money. 20140614-084835-31715848.jpg 
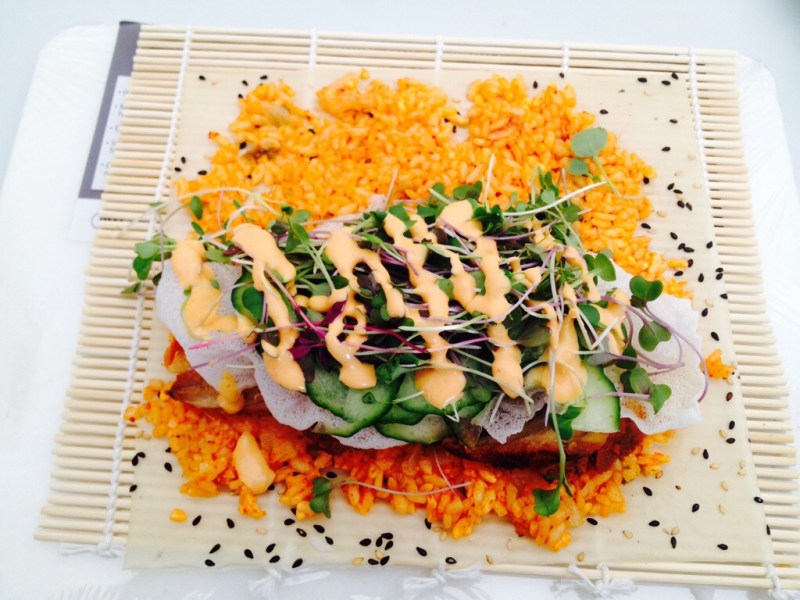
And behold the sushirrito. 20140614-084836-31716016.jpg

And if you want to see how the pro’s do it:

Screen Shot 2015-05-27 at 12.30.12 PM

The Magic Shell

Standard

Now that summer is upon us, there are fewer things better than ice cream except maybe having 2 whole months off and not having any responsibilities or anyone to answer to.  Today if I did that, it would be called a sabbatical or worse yet, stress leave–both of which are a polite way of saying that you’ve lost your marbles.  I believe the clinical term is ‘gone scooters’.

I digress.

Actually, the only thing better than homemade ice cream is the Smuckers Magic Shell, that cloyingly sweet, crunchy chocolate topping that hardens upon coming in contact with something cold, like ice cream!  So since I was too lazy to make my own ice cream, I opted instead for TJ’s French Vanilla for my experiment.

IMG_0130

2 ingredients are all you need for this magical concoction: coconut oil and chocolate chips.  The beauty of it is you control the sweetness of your magic shell with the kind of chocolate chips you use: semi-sweet, dark or milk.  For an added crunch, I included pinipig which I found in a Filipino grocery store.  If you can’t find pinipig, Rice Crispies cereal makes a good substitute

Magic Shell

1 cup of coconut oil

1 1/2 cups of chocolate chips

1/2 c of pinipig or Rice Crispy cereal

Melt chocolate and coconut oil together in a double boiler over low heat.  Once melted, spoon over your ice cream , letting excess chocolate drip.  Before the shell hardens, roll your vanilla ice cream in a cone over some pinipig.  Shell should harden in less than a minute.  The first one comes out a little gnarly but you’ll find that as you practice, they do get prettier.


photo 1(1)