Isn’t Sushi Lovely

Standard

I took something called Conceptual Physics in high school.  It’s not real Physics; it’s Physics without all the difficult equations and concepts are translated from math into English for those not ‘mathletically’ inclined like myself.  In short, it’s Physics for dumdums. I have no shame in owning that.  I had fun in high school, cut class a lot and saw the inside of Stonestown more than classrooms during my senior year.  And I mostly turned out OK.

Baked sushi is like conceptual physics in that it is sushi for those of us who don’t have the means nor the patience and expertise to roll out real sushi.  And it turns out better than OK.  Allow me to compare and contrast:

  • Real sushi is all about fresh, good quality fish like ahi tuna and hamachi.
  • Baked sushi uses your seafood of choice, the cheaper the better like imitation crab, baby shrimp and salmon that has been roasted and flaked.
  • Real sushi is perfectly structured; either rolled in seaweed, futo maki, or hand formed, nigiri .
  • Baked sushi is a casserole–yep, I said casserole.  No bamboo mats needed, only a spatula to evenly spread your fish over a thin layer of cooked rice.

Ingredients:

3 c of cooked white rice
1 lb salmon, roasted and flaked
1 lb imitation crab
1/2 c Japanese mayo, Kewpie*
1/2 c sour cream
1/4 lb masago
furikake seasoning**

Procedure:

Preheat oven to 375 degrees.

Spread a thin layer of hot cooked rice on a 9×12 baking pan.  Cold rice is hard to spread so ensure your rice is hot enough to spread with a rice paddle or spatula.  Sprinkle furikake seasoning all over cooked rice.  Mix the rest of the ingredients together and spread evenly over the rice with an offset spatula.  Sprinkle the top of the seafood and mayo/sour cream mixture with more furikake seasoning.  Bake for 20 minutes.

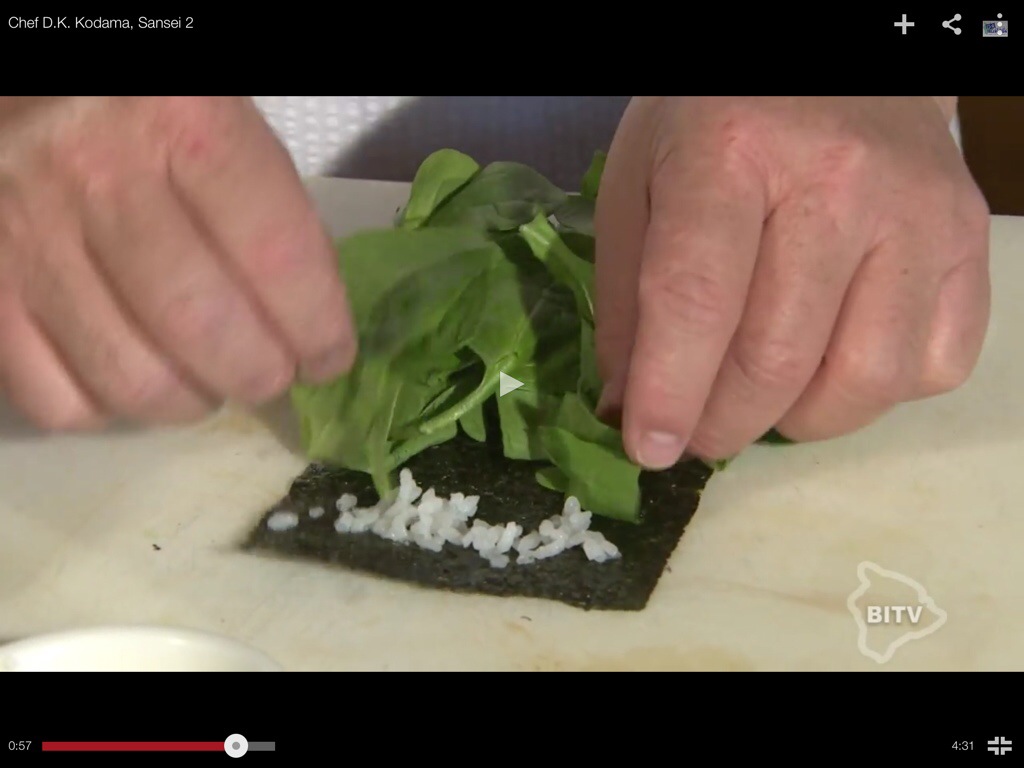
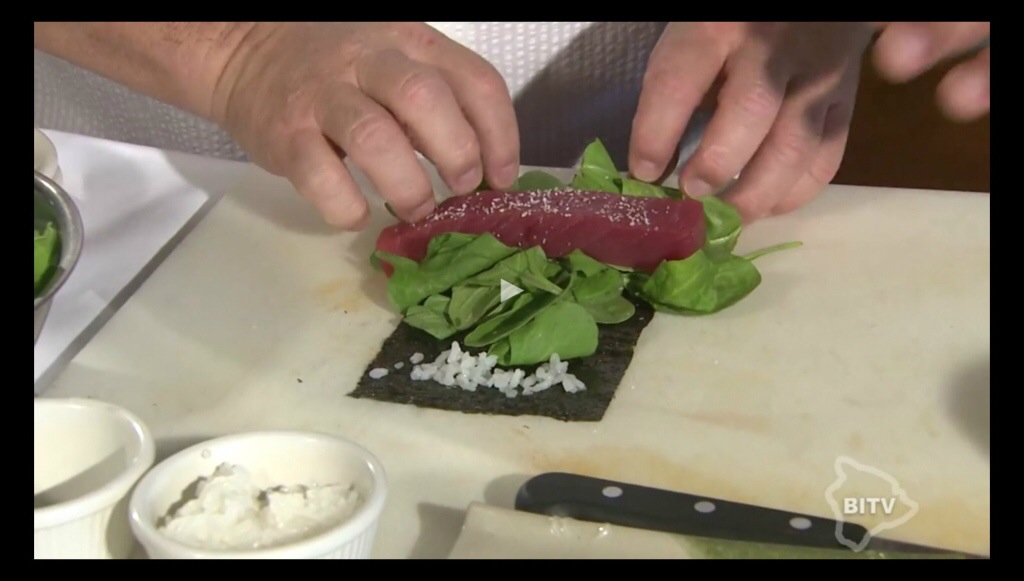
You can either eat right out of the pan or take a spoonful and wrap it inside some nori.  Flavored nori comes in a jar of individually wrapped packets.

*You can substitute American mayo for the Japanese mayo.  I just find that the Japanese variety is a little less tangy and creamier than its American cousin.

**Furikake is a dry Japanese seasoning with seaweed, sesame seeds, etc.  I just found out that the ‘etc.’ is MSG and I now understand why it makes everything I put it on taste so good.

18765901_10154386790231401_6785771030543573762_nBaked sushi lovingly topped with some sriracha mayo

Save

Advertisement

Chocolate ‘Chia’mporado

Standard

Growing up in the Philippines, I lived on champorado.  My mom made it a lot mostly because it was sweet, filling, cheap and good.  Champorado is a sweet chocolate rice porridge, which Mom usually made from a boxed mix.

IMG_1826

It’s even better when she tops it with tuyo, a salty dried fish.  What.  Don’t judge–Filipinos made that sweet-savory thing before it was a thing.  Tuyo is like bacon–just as crunchy and salty–except it’s fish and smells really bad when you cook it indoors.

I wanted a different take on my favorite childhood merienda and decided that I would make a healthy version with chia seeds.  Chia seeds when soaked in liquid become pudding-like in texture, kind of like a rice pudding.  It’s so easy to make and chances are, you’ll have most of the ingredients on hand.

And the bonus is, it makes a really great pun.

Chocolate Chiamporado

Ingredients

3/4 cup soy milk or almond milk (avoid non-dairy milk to keep low fat)
1/4 cup chia seeds
3 T unsweetened cocoa powder
1t vanilla extract
4-5 T maple syrup
1/2 t grated orange zest
3T orange juice
*1 packet of Splenda (optional)

Procedure

Whisk all ingredients together and refrigerate overnight. Seeds gel when they come in contact with liquid so you’ll wake up to a creamy pudding with a slightly nutty texture. Top with a sprinkle of grated orange zest, slivered almonds and chocolate chips.

*I happened to have Splenda on hand so I added a packet.  Feel free to omit and instead adjust the amount of maple syrup to your desired sweetness.

img_2002

Tortang ‘Talong for the Ride’

Standard

My mom was and still is a very resourceful woman.  We lived in the Philippines before coming here and back then, we didn’t have much.  The running joke was that Mom can make a dinner out of two chicken legs that can feed 4 people.  Over two meals.  That’s a slight exaggeration but I do distinctly recall being told on more than one occasion that it was rude to reach across the table in an attempt to grab the bigger piece of chicken before my Dad got to it.  I was 7 at the time.  I’m a little embarrassed to admit that.

Tortang talong or eggplant omelet is a meal that’s hearty, healthy and inexpensive, so my mom made this often.  Chinese or Filipino eggplant (the skinny variety) and eggs are all you need; ground meat is optional.  You can’t use the regular fat eggplant for this dish and you’ll see why in a minute.

  1.  Char the eggplant on all sides by grilling until its skin turns black.  Peel the skin off when the eggplant is cool enough to handle.

11050098_10153008028321401_325104854363526166_o


2.  Use your fork to flatten the eggplant to a wide, oval shape.  This helps increase the surface area to house your ground meat.  If you had used the obese by comparison eggplant, your tortang talong would be the size of manholes.

11838829_10153008028786401_5946599687221782204_o


3.  Dip the now flattened eggplant into your egg batter, making sure to coat both sides.  Coat the ground meat with the egg batter as well.  This makes the meat moist, sticky and allows it to adhere to the eggplant which is critical during the flipping phase.

11999761_10153008028326401_1161701057525461613_o


One bit of cautionary tale on the flipping of the tortang talong: it took me multiple tries and 24 eggplant, to flip it just right so that the ground meat filling doesn’t collapse into a shapeless mess like this.

11754846_10153008028971401_3871602515417174231_o


The best way is to hold the eggplant by its stem and flip vertically from top to bottom and not side to side.  This is the best YouTube tutorial I’ve found on how to accomplish this.  Girlfriend’s voice is annoyingly high pitched and painfully nasal but skip to 4:06 and you’re all good.  It’s also all in Tagalog.

Screen Shot 2015-09-14 at 7.53.34 PM

Ingredients

      • 1 lb ground pork
      • 1 c salsa
      • 5-6 cloves garlic, minced
      • 1 medium onion, minced
      • 4 eggplants
      • 4 large eggs
      • salt to taste
      • ground black pepper to taste
      • vegetable oil

Procedure

    1. Grill eggplant until skin turns black; peel off the charred skin. Keep the crown and stem. Flatten the flesh and set aside.
    2. Saute garlic and onion until tender about 5 minutes.  Mix in ground pork and brown until cooked.  *Combine salsa with cooked ground pork and heat through, another 5 minutes.
    3. Season with salt and ground black pepper to taste.
    4. Remove from pan, transfer to a bowl and cool.
    5. Once the mixture has cooled down, add the beaten egg and mix well.
    6. Dip flattened eggplant in beaten egg and coat both sides.  Cook the eggplant omelet in a well oiled, heated pan.
    7. Spoon 3-4 tbsp of ground pork and egg mixture spread it all over top of eggplant.
    8. Cook for about 3 minutes until eggplant can be easily lifted and without sticking on the pan.
    9. Carefully flip to other side by holding the stem on one hand and a spatula on the other and cook for another 2-3 minutes.

*Salsa is a twist on the traditional tortang talong.  It adds flavor, depth and an unexpected yet welcome kick to your tortang talong.  You can use any jarred kind, my favorite is Trader Joe’s Roasted Garlic Chipotle Salsa.

Tortang Talong

Bowl Me Over: Sisig Tuna Bowl

Standard

The alternate title was going to be Eating Healthy Doesn’t Have to Suck: Sisig Tuna Bowl. Mostly because I’ve been trying to tell myself this as of late.

March and April have been eventful months, hence my absence from this blog.  The chronicle of events is as follows: The mom of one of JJs classmates died of a brain aneursym.  Shortly after, my aunt had a really bad infection, became septic and was in the ICU for weeks.  JJ turned 6.  He turned 6 the same day Pru passed a kidney stone.

The first of these aforementioned events had a profound effect on Pru and me.  Exactly two weeks before she died, this mom and Pru were sitting on the bleachers watching JJ and his classmate run around the basketball court.  She and Pru talked of summer plans, our families going to each others houses to barbecue and smoke cigars while the kids played or watched movies together. Two weeks later, at the age of 41 this woman who ran marathons and was the picture of health died, leaving her husband and two daughters–one seven and the other, JJs age.  It’s been more than a month since her passing and I can write about it now but the weeks after were hard ones; we were suddenly reminded of our own mortality and tried to explain to JJ what this all meant since we were attended the services. I don’t think we did a very good job.

I know this because the day Pru passed a kidney stone and we were en route to the hospital at 6:45AM on JJs birthday, he asked me, “Mom, I won’t have a daddy anymore like Y__ doesn’t have a mommy anymore?”

Had I not been driving I would’ve dissolved into a puddle of tears.

So as a result of all this, Pru and I got religious about our health and started sporting a FitBit (him) and a Jawbone (me).  I admit that when I first started wearing the Jawbone, I wasn’t reaping its full benefits.  It was getting a lot of compliments and so I kept wearing it.  The barrista at Peet’s said, “I like your bracelet.  Looks edgy.  What does it do?”  I responded sheepishly, “It’s supposed to get my ass off the couch.  So far, it just gets me random compliments from barristas.”

Since then, we’ve been consistent about getting our steps in even though we look like a couple of loons walking in circles around the house and logging all the food we eat.  While keeping a food journal appeals to my innate OCD tendencies, a meal at The Cheesecake Factory becomes a very interesting exercise.  I either log the 1,383 calories from the Bang Bang Chicken and Shrimp and the 1,079 calories from the Dulce de Leche cheesecake, or I just suspend disbelief for the duration of the meal.

I usually opt for the latter.  When the choice is denial or misery/denial or guilt,  I almost always choose denial.

So on to the Sisig Tuna Bowl:

1 1/2 to 2 lbs of frozen ahi tuna
1/2 onion, diced
olive oil
1 T lemon juice
1/2 t lemon pepper
1/2 t Old Bay
1 Mama Sita’s *sisig packet

Combine olive oil, lemon juice, lemon pepper and salt. Brush both sides of tuna steaks with the marinade and refrigerate for an hour.  Using a stove top grill pan, grill tuna over medium heat for 5 minutes on each side. Remove from heat and cool. After cooling for 10 minutes, cut the tuna in a small dice. Follow instructions on sisig packet which is essentially add 1/2 c. of water to the seasoning packet. Saute diced onions along with the tuna.   Pour sisig mixture over tuna and onions, making sure all are coated in the marinade. Cook over medium heat until tuna and onions are sizzling in the pan and all the liquid is dissolved.

You can get creative with your bowl.  I usually assemble mine with brown rice, sliced avocado, queso fresco and Trader Joe’s frozen roasted corn. Sprinkle the whole thing with a dash of *Tajin and a splash of lime or lemon juice.

*Notes:
Sisig is…hard to explain if you aren’t Filipino or don’t know Filipinos. It is probably the We are a sisig loving people. It basically means anything–and by anything I mean pig parts you don’t often eat like cheeks and ears–cooked in a citrus and chili pepper mixture. Here’s the Wiki link that is remarkably accurate (must have been written by a Filipino or someone who knows a Filipino). What DID we do before Google and Wikipedia?

Tajin is a lemon, salt, chili powder seasoning that makes everything you put it on taste salty, spicy, magical. Again, here is the Wiki link for your reference on the Tajin.


IMG_2089This nifty gadget saves me time and tears when dicing onions.  The sisig packet is pictured above.

IMG_2097After grilling your tuna, saute the diced pieces with onions

IMG_1725

Ramen

Standard

I had some leftover kalua pork for a luau themed party–a lot of kalua pork, actually–and I’m looking for and/or making recipes that have kalua pork in them without necessitating the use of barbecue sauce.

Day 1: Kalua Pork Ramen

We procured some Sun Ramen noodles, allegedly the same kind used by David Chang of Momofuku fame. Found this at nearby Nijiya Market for about $5 per pack with 2 servings of sauce packets and noodles. The recipe calls for 1 cup of water to be used with each serving of packet and noodle. But I found the ramen too salty and the noodles absorbed all the water so the whole concoction was a little dry. Today, I used 3 cups of water and the flavor was perfect and there was just the right amount of broth to noodle ratio.

I can’t wait for winter. This is the perfect comfort food.

IMG_0633.JPG

Sun Ramen is available at Nijiya Market (various locations) and Tokyo Fish Market in Berkeley.

Panko Crusted Ahi

Standard

I am really jonesing for an island vacation right now.  We just got back from Disney World and as much as my son loved it, my feelings about it are decidedly, meh.  Don’t get me wrong, I love the magic and innovation and creativity Walt Disney imagined for this 48 square miles of swampland in South Florida.  And when I watched my son’s awe at the fireworks show in Epcot, my heart melted and I temporarily forgot about the exorbitant prices for extraordinarily mediocre food.  But it isn’t Maui or Oahu.  So here I am back home and missing the islands and the amazing sunsets,

IMG_3555stopping at roadside stands to sample fresh coconut juice, IMG_3784and perusing farms to sample their local fare, like the honey lavender and lavender scented scones and brownies from Kula Farms.

IMG_3586

Last year, we visited Maui.  We have a tradition of going out for a special dinner on our last night and we chose Sansei located at the Kalakaua Resort.  We stayed in the area a few years ago and had wondered what all the fuss was about every time we passed by and saw a long line of people faithfully forming out the door of Sansei.  Last year, we found out why.  It was easily one of the best and most memorable meals I had while on Maui, almost as good but a fraction of the price at Mama’s Fish House and better than Hali’imaile General Store.  Service was excellent, the food creative and flavorful.  The location is a bit of a drive if you’re staying in Lahaina or along Kaanapali Beach, but well worth it to plan and make reservations. 

My favorites were the Shrimp Dynamite – think honey walnut prawns but not too rich or cloying, just nicely seasoned and crispy shrimp with a little bit of heat and the Yaki Maki, a California roll wrapped with smoked salmon and baked with their dynamite sauce, aka my sriracha aioli.   But the roll that spoke to me, the one that really wooed me into making it at home was the Panko Crusted Sashimi Roll–fresh sashimi wrapped in spinach and arugula and rolled in panko and awesome interplay of textures and flavors.  And no, I didn’t take any pictures because I was too busy enjoying my food and I still can’t bring myself to taking pictures of my food while I’m in a restaurant.

True to form, I Googled this when I got home and searched for the video. Sure I bought the book but I had to see how it was done; the dish wasn’t just delicious it was also beautiful and I needed it to look just right.  Thanks to YouTube and Big Island TV, Chef D.K. Kodama owner of Sansei shows you himself.

Spread a small amount of rice at the top of the nori as this acts as glue when you’re ready to wrap your roll. Lay the arugula leaves and spinach on the bottom third of the nori.

20140705-184137-67297335.jpg

Lay a strip of sashimi grade tuna on top of the bed of spinach and arugula.

20140705-184541-67541572.jpg

Roll tight with a sushi rolling mat. Roll in flour, dip in tempura batter then roll in panko.

20140705-185738-68258195.jpg

Deep fry that beautiful creation and lay it on top of your soy wasabi butter sauce.

Panko Crusted Ahi

Fried Maitake Mushrooms

Standard

I first had fried maitake mushrooms at RN 74, a chic lounge and restaurant at the base of the Millenium Tower in San Francisco and modeled after the Gare de Lyon station of the Paris metro.  The bar area reminds me of a very upscale Starbucks complete with retro style lounge sofas intended to be intimate seating areas for you and your friends to enjoy your French-imported beer Kronenbourg or the specialty cocktail Pims 74.  The Pims 74 is ginger beer served in a wine goblet with pomegranate seeds, cinnamon sticks and lemon slices in the glass–it looked a little like potpourri in a glass but was refreshing and sweet.

The restaurant area is surprisingly small but at a Michael Mina eatery, it’s all about the service that makes you feel as if you are the only patrons dining there.  Service was spot on, water glasses filled constantly, napkins folded upon return from the restroom and staff knowledgeable about the food and drink.

The tempura fried Maitake mushrooms were the high point of my meal.  We were trying to figure out how something like mushroom with such high moisture content could be fried so light and airy (like we were going to find maitake mushrooms at the corner Safeway); I’m guessing egg white and rice flour batter and deep fried for a couple of minutes at a really high temperature.

Years later, I found the recipe here and even better, I found the friggin’ Maitake mushroom!  No, not at Safeway but at a local Asian grocery store, Ranch 99.  Then Ranch 99 stopped carrying them and I again found them at another nearby market, Marina.  This dish cost $10 five years ago and it is $13 now, per Yelp.  The rice flour and three ounces of mushroom cost $2 each.  Do the math.  Or not.  Just know that it’s way cheaper.  And so good and easy to make!

Recipe adapted from sfgate.com


Ingredients:
  •  4 to 6 ounces maitake mushrooms (also called Hen of the Woods; see Note)
  • Rice bran oil or canola oil, for frying
  • Batter:
  • 2 ounces white rice flour (about 1/3 cup + 1 tablespoon)
  • 1 ounce cornstarch (about 1/3 cup, less 4 teaspoons)
  • 1/8 teaspoon baking powder
  • 3 1/2 to 4 ounces cold sparkling water + more if needed
  • Fine salt to taste (see Note)


Instructions:
  1. Trim maitakes if needed, then break them into 2-bite clusters; set aside. Fill a deep pot with about 1 1/2 to 2 inches of oil and preheat to 375 degrees-380 degrees.
  2. Meanwhile, combine all of the dry ingredients in a mixing bowl. When the oil temperature reaches (or is very close to) 375 degrees, add the sparkling water all at once to the dry ingredients, lightly stirring with a rubber spatula until just combined. Do not overwork the batter, which should be the consistency of heavy cream. If you prefer a thinner batter, add another tablespoon of sparkling water. (A thinner batter will remain crisp for a longer time.) Immediately batter the mushrooms.
  3. As you lift the mushrooms out of the batter, lightly scrape them over the edge of the bowl to remove excess. Working in batches as needed, carefully place in the oil and fry until batter is crisp and mushrooms are lightly golden and cooked through, about 1 1/2 to 2 minutes. Be careful not to overload the oil with too many mushrooms all at once because the oil temperature can rapidly drop. Turn mushrooms over if needed to brown both sides. Remove with a slotted spoon or spider and drain briefly on paper towels before sprinkling with salt to taste. Serve immediately.

Note: You can also use oyster, cremini or similar mushrooms – just be sure that they are about the size of an index finger so there is a good ratio of batter to mushroom. If you try chanterelles, select ones with thin caps, and be sure they are fairly dry. RN74 serves the tempura with flavored salts. To flavor salt, whir it with ingredients like tangerine/orange zest, which provide an aromatic lift. Truffle salt is also great.  I served mine with a side of ponzu sauce.

fried maitake

Spicy Thai Mussels, aka Thai them on!

Standard
I am a little ashamed to admit that I’ve turned into Martha Stewart–Manang Stewart to be more exact–in that I love planning theme parties.  Actually, I only really like planning one type of theme party and that is the luau.  Because of my love for everything Hawaiian– from the food to the aloha spirit and the beauty of the islands–the luau evokes all these things for me and my guests.  We go all out with lighted tiki torches and a menu of lomi lomi salmon and kalua pork, huli huli chicken and passion fruit mochi and POG juice to wash it down.  Once, I even made my own poke with fresh ahi tuna, limu and kukui nut procured from one of my all-time favorite markets Takahashi in San Mateo.

IMG_3261

If I could dig up an imu in which to bury a whole pig wrapped in ti leaves the way kalua pork is traditionally made, I would.  Except Pru would have a problem with my doing that in our cemented backyard.

I’m planning to serve my spicy Thai mussels for a luau we’re having in August.  Yeah, yeah they’re not Hawaiian but they seafood braised in coconut milk so close enough.  This dish is so easy to make and will wow your guests with bold, spicy flavors from the Thai chiles and ginger.  They’ll also love sopping up the savory broth with a crusty baguette or over rice.  I tried using low fat coconut milk in this recipe but it didn’t come out as rich nor as flavorful as when I used the full fat variety.  So splurge on the extra calories, it will be worth it!

Recipe adapted from Tyler Florence’s Steamed Mussels with Coconut Milk and Thai Chiles


4 garlic cloves, coarsely chopped2 Thai chiles, thickly sliced

One 1 1/2-inch piece of fresh ginger, peeled and coarsely chopped

1 cup cilantro leaves

Finely grated zest of 1 lime

1/4 cup extra-virgin olive oil

Two 13 1/2-ounce cans unsweetened coconut milk

Juice of 2 limes

Salt

One 11- to 12-ounce bottle lager

5 pounds mussels, scrubbed

  1. In a food processor, combine the garlic, chiles, ginger, cilantro, lime zest and olive oil and process to a paste; transfer to a large bowl. Whisk in the coconut milk and lime juice and season with salt.
  2. In a large soup pot, bring the lager to a boil over high heat. Boil until reduced to 1/2 cup, about 7 minutes. Add the mussels, cover and cook, shaking the pot a few times, until the mussels just begin to open, about 4 minutes.
  3. Uncover the mussels and stir in the coconut milk mixture. Cover and cook, shaking the pot a few times, until all of the mussels open, about 8 minutes. Spoon the mussels and broth into bowls and serve.
 

The recipe can be prepared through Step 1 and refrigerated overnight.

cropped-img_1397.jpg

Sriracha and Wasabi Aioli

Standard

I don’t care for Guy Fieri.  There’s this lounge lizard quality about him that no matter how legit he tries to be (game show host?  Really?) he’ll always be this lecherous character to me. But the one thing I learned from Guy is how useful and handy squeeze bottles are. You can control amounts of sauce, you can see what you’re using and they’re super cheap at about $1 a pop and found everywhere.

My favorite condiment right now is my own homemade sriracha and wasabi aoli and they are stored in my Guy Fieri-inspired squeeze bottles (I cringe at the thought of admitting that). I first saw them served at food trucks, usually found on side tables right next to napkins and the like. They were a great flavor boost to Korean tacos and burritos, waffle fries and anything else you care to jazz up. You can use regular mayonnaise but I prefer the Japanese Kewpie Mayo, as I find this to be sweeter and not as gloppy than its American cousin. You can find Kewpie at any Asian grocery.

Sriracha Aioli

1 cup Japanese Kewpie or Best Foods Mayonnaise
3 tablespoons Sriracha
1 teaspoon rice vinegar
1/2 teaspoon sugar

Whisk together the mayonnaise, Sriracha and sugar. Use more or less of the Sriracha to adjust the heat.

Wasabi Aioli

1 cup Japanese Kewpie or Best Foods Mayonnaise
3 teaspoons wasabi paste
1 teaspoon rice vinegar

Whisk together the mayonnaise, wasabi paste and rice vinegar. Use more or less of the wasabi paste to adjust the heat.

20140703-120923-43763176.jpg

These sauces have been wonderful additions to some of my creations:

20140703-123122-45082702.jpg

20140703-123122-45082224.jpg

20140703-123121-45081996.jpg

Poke! From Costco. Oh.

Standard

Actually it’s not that bad. It’s no Foodland and not even in the same universe that is Da Poke Shack but if you can’t afford an island vacation or like me, made the unwise and ill-informed decision of Disneyworld in June (Really? It’s 90 degrees in Orlando now? Oh good…) then make a stop at your nearby Costco. And get your fill of ahi poke, wasabi poke, shoyu poke, etc. Prices are pretty modest at $16.99/lb.

We added some sriracha aoli to this one and made it a spicy ahi poke. If you shut your eyes real tight and play some Iz, you’ll be transported to Kona. Or Maui. Or just lunch with the peeps who talked you into Disneyworld. In June. In 90 degree heat.

20140621-143610-52570248.jpg