BAEbingka: Bibingka in Muffin Tins

Standard

Celebrating Christmas as a kid in the Philippines was very different than it is here.  My earliest memory was of my grandmother standing over baked hams and chickens hours before our midnight feast or ‘media noche’ as celebrated by many Filipinos, tending to them with love and careful attention.  My family didn’t have much, so it was not about counting the number of shopping days left, tons of presents under the tree, scanning the Black Friday ads. In short, it wasn’t about stuff.

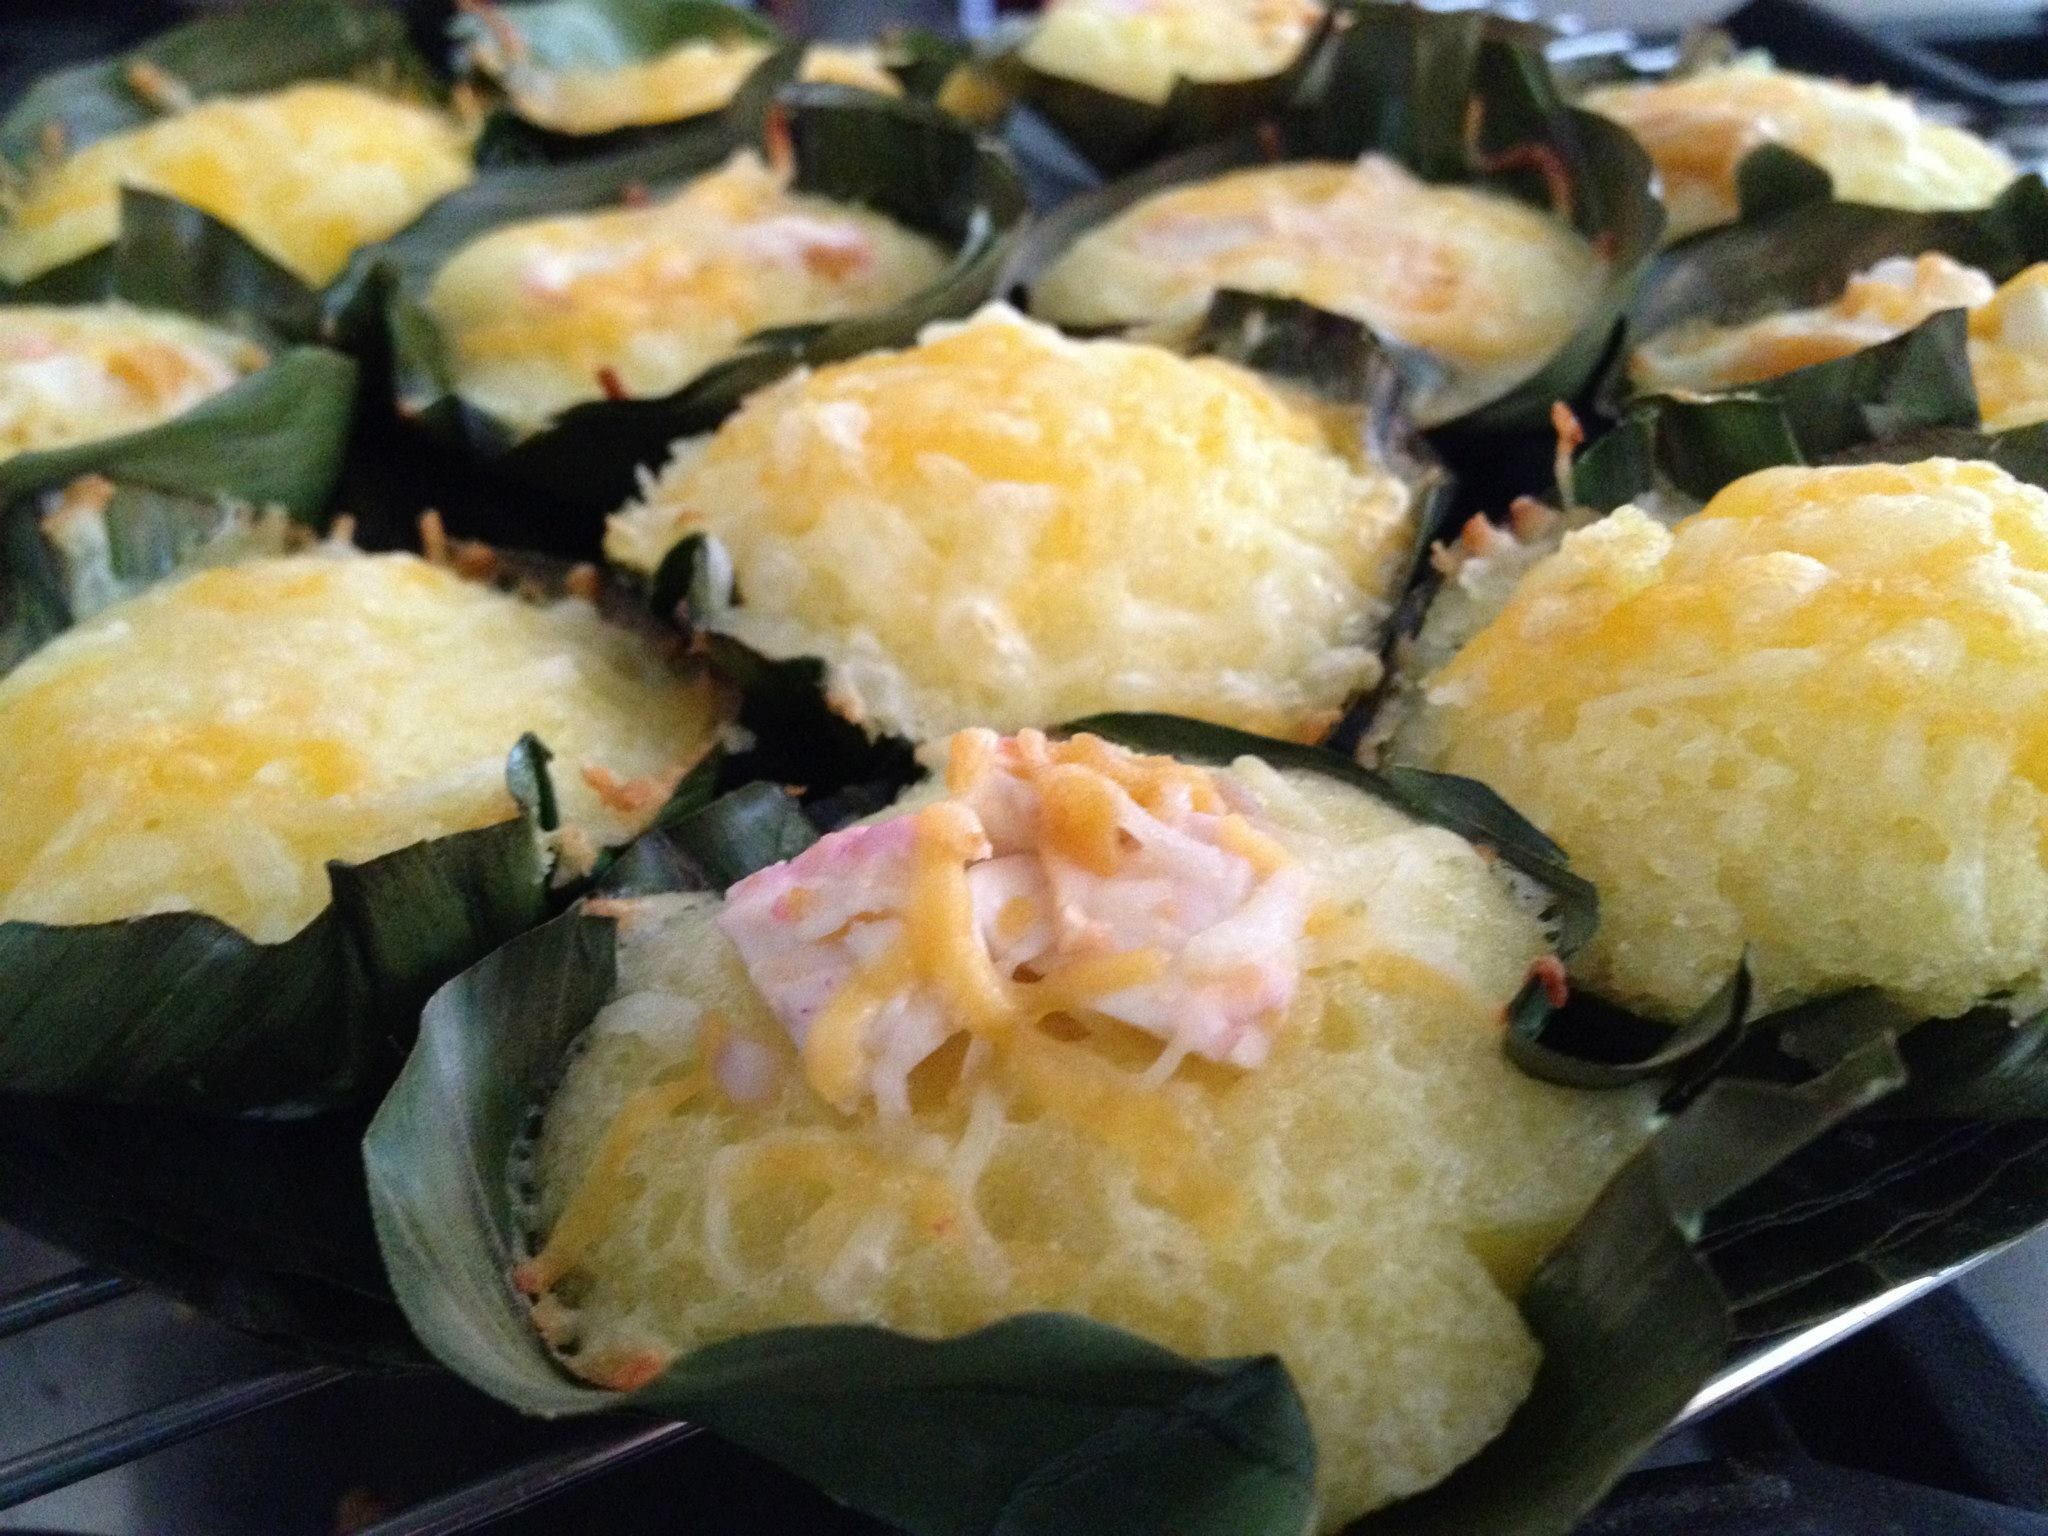
What it was about was family, food and the ‘exchange gift’ or White Elephant but much kinder because there was no stealing involved. What I remember most about Christmas though is the bibingka, a Filipino rice cake baked in banana leaves and topped with cheese and salted egg. I believe Filipinos started combining the salt/savory thing before it even became en vogue and this is evidenced by our love for the bibingka.

My grandmothers made their own versions of bibingka and I no longer remember which was better but it was always this great combination of salty bites of duck egg and the sweet softness of the rice cake. It was the crowning glory of our media noche, which began with pork barbecue sticks, longanisa and lechon and ended with the bibingka.  Lechon by the way is roasted suckling pig and proclaimed by Anthony Bourdain as the best pork product ever. The Filipinos, we love our pork.

But I digress.

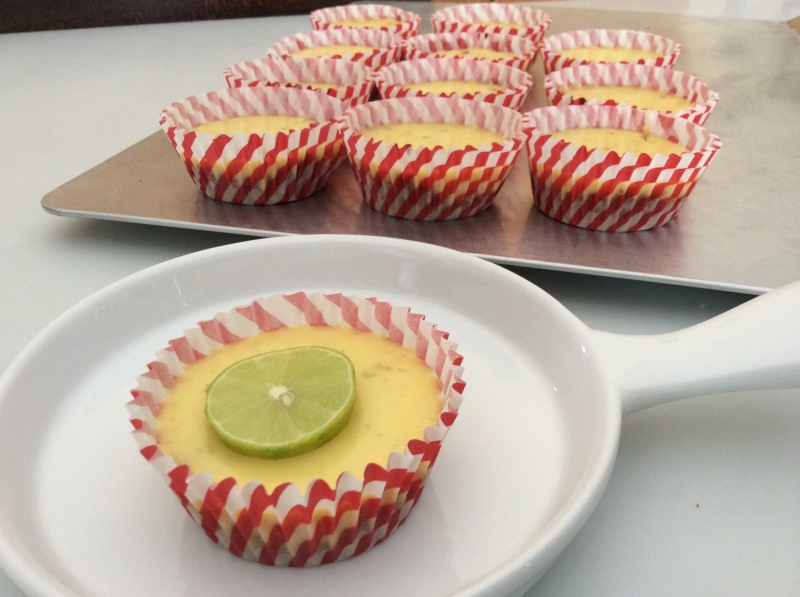
For portion control purposes, I decided I would make my bibingka in muffin tins.

Recipe adapted from Panlasang Pinoy

Ingredients

1 cup rice flour
1/8 teaspoon salt
2 1/2 teaspoon baking powder
3 tablespoons butter
1 cup granulated sugar
1 cup coconut milk
1/4 cup fresh milk
1 piece salted duck egg, sliced
1/2 cup grated cheese
3 pieces raw eggs
Pre-cut banana leaf

Procedure

  1. Preheat oven to 375 degrees.
  2. Combine rice flour, baking powder, and salt then mix well. Set aside.
  3. Cream butter then gradually put-in sugar while whisking.
  4. Add the eggs then whisk until every ingredient is well incorporated.
  5. Gradually add the rice flour, salt, and baking powder mixture then continue mixing.
  6. Pour-in coconut milk and fresh milk then whisk some more for 1 to 2 minutes.
  7. Use the bottom of a glass as a template to cut banana leaves in circles slightly larger than the  size of your muffin tin openings.  This allows for a nice overhang and ample size to hold the bibingka batter.
  8. Line muffin tins with your pre-cut banana leaves.
  9. Pour batter into lined muffin tins.
  10. Bake for 15 minutes.
  11. Remove from the oven then top with sliced salted egg and grated cheese (do not turn the oven off).
  12. Put back in the oven and bake for 10 to 15 minutes or until the top turns a medium brown.
  13. Remove from the oven and let cool.
  14. Brush with butter and sprinkle some sugar on top. You can also top this with grated coconut.

Notes:

If you’re thinking about omitting the banana leaf liner, don’t.  The banana leaves give your bibingka a fragrant and authentic look and smell.

If you’re thinking about omitting the salted egg, by all means do.  It’s an acquired taste and also hard to find outside Filipino groceries.  I would, however, include the grated cheese to balance out the sweet and savory.

image

The Magic Shell

Standard

Now that summer is upon us, there are fewer things better than ice cream except maybe having 2 whole months off and not having any responsibilities or anyone to answer to.  Today if I did that, it would be called a sabbatical or worse yet, stress leave–both of which are a polite way of saying that you’ve lost your marbles.  I believe the clinical term is ‘gone scooters’.

I digress.

Actually, the only thing better than homemade ice cream is the Smuckers Magic Shell, that cloyingly sweet, crunchy chocolate topping that hardens upon coming in contact with something cold, like ice cream!  So since I was too lazy to make my own ice cream, I opted instead for TJ’s French Vanilla for my experiment.

IMG_0130

2 ingredients are all you need for this magical concoction: coconut oil and chocolate chips.  The beauty of it is you control the sweetness of your magic shell with the kind of chocolate chips you use: semi-sweet, dark or milk.  For an added crunch, I included pinipig which I found in a Filipino grocery store.  If you can’t find pinipig, Rice Crispies cereal makes a good substitute

Magic Shell

1 cup of coconut oil

1 1/2 cups of chocolate chips

1/2 c of pinipig or Rice Crispy cereal

Melt chocolate and coconut oil together in a double boiler over low heat.  Once melted, spoon over your ice cream , letting excess chocolate drip.  Before the shell hardens, roll your vanilla ice cream in a cone over some pinipig.  Shell should harden in less than a minute.  The first one comes out a little gnarly but you’ll find that as you practice, they do get prettier.


photo 1(1)

Mini Key Lime Pies

Standard

Nine years ago, I weighed about 50 lbs more than I do now.  That’s 15 pounds less than my 5-year old.  Then I lost a bunch of weight, largely propelled by lots of back handed compliments like, “You’d be pretty if you weren’t so fat.” My personal favorite was “How far along ARE you?”  A question my Auntie Precy repeatedly asked me despite being well aware of the fact that I was 19 and single at the time.  But whatever.  By the way, my secret was not eating carbs for like 2 years.  I’ve since gained about 12 pounds of it back (after 9 years, not bad!) but at least I weigh less than a baby pachyderm.

Since then, I’ve reintroduced carbs back into my diet and learned that which has eluded me nearly all of my childhood and adult life: portion control.  That’s why I like to make shrink down food to cute, Lilliputian sizes.


photo 4

Zest the key limes before you juice them

photo 3

Squeezing key limes by hand is like seeding strawberries–invest in one of these

photo 3(1)

..and one of these…they call them tampers.


photo 5

Cute, aren’t they?

*The original recipe called for 2 cans of condensed milk but I couldn’t quite bring myself to adding that second can (see intro above).  So, it came out a little tart, but nothing that a little dusting of powdered sugar couldn’t fix.

Mini Key Lime Pies

Ingredients:
12 squares (1 1/3 package) of graham crackers, pulverized in your foodprocessor
3 T Sugar
3/4 stick butter (about 1/3 cup)
3 egg whites beaten
1 (14 oz) cans sweetened condensed milk
3/4 cup lime juice (about 20 limes)
1 T Lime zest
1/2 c sour cream

Instructions:

  • Press 1 tablespoon graham cracker mixture into the bottom of a cupcake liner, pressed down
  • Bake at 350 degrees for 7 minutes then set aside
  • Mix together egg whites, condensed milk, lime juice, lime zest, and sour cream
  • Use ice cream scoop to evenly fill lined muffin tins 3/4 way full
  • Bake for 12-15 minutes and cool.
  • Keep overnight in the fridge if you prefer to set fully